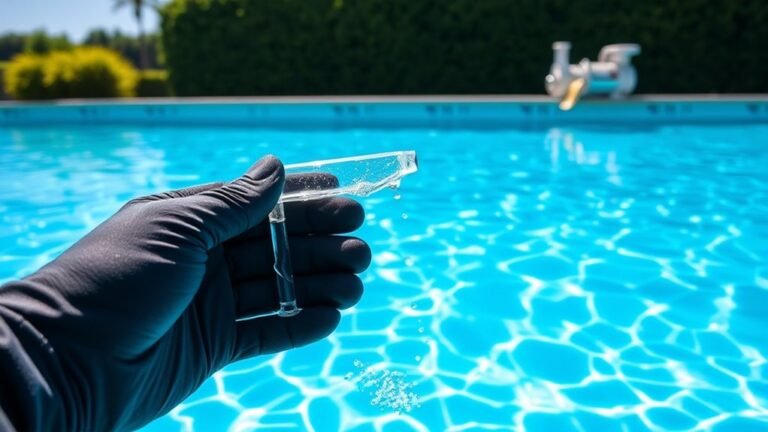

How to Clean Swimming Pool Salt Chlorinator Cells in 10 Easy Steps
First, turn off your pool pump and power supply to ensure safety when cleaning your swimming pool salt chlorinator cells. Carefully remove the salt chlorinator cell from the system. Inspect it thoroughly for any calcium buildup or debris that may affect its efficiency.
Next, prepare a cleaning solution using white vinegar or a cleaner recommended by the manufacturer. Soak the cell in this solution for 1-2 hours to dissolve the buildup gently.
After soaking, use a soft brush to scrub the cell carefully without damaging the plates. Rinse the cell thoroughly with fresh water to remove all cleaning residues. Repeat the soaking and scrubbing process if necessary for stubborn deposits.
Finally, reinstall the cell securely, turn your system back on, and monitor its performance to ensure it is working efficiently. Keep following for detailed steps to maintain a spotless, efficient chlorinator.
Turn Off the Pool Pump and Power Supply
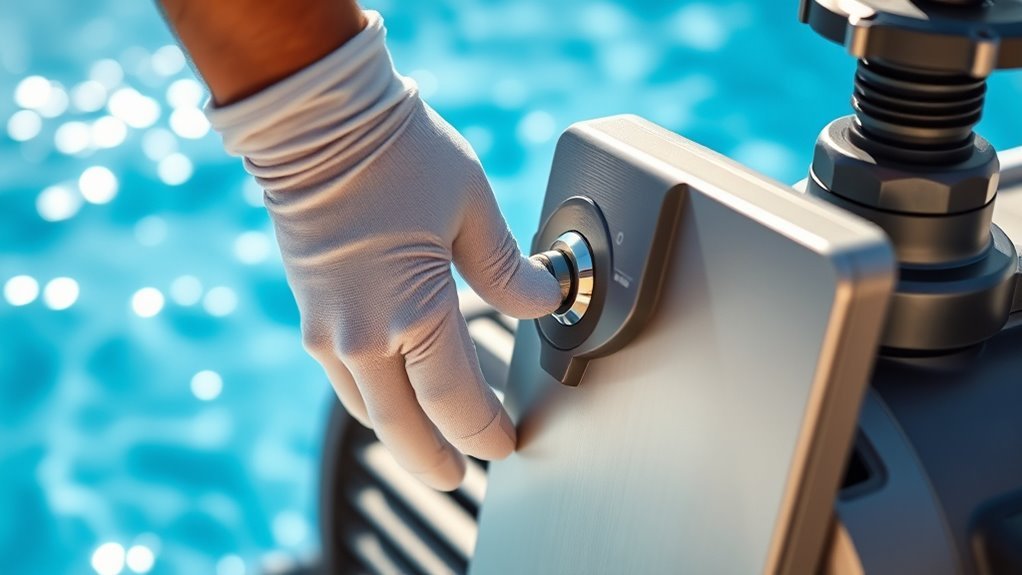
Before you begin cleaning the salt chlorinator cells, make sure you turn off the pool pump and power supply. This step is vital for your safety and to prevent any damage to the equipment.
Locate the pool pump switch and turn it off. Then find the power supply to the salt chlorinator unit and disconnect it. Doing this guarantees no electricity is running through the system, reducing the risk of electrical shock while you work.
It also prevents the chlorinator from operating during cleaning, which could cause malfunctions. Don’t skip this step; it’s a simple yet essential precaution.
Once both the pump and power are off, you’re ready to proceed safely with cleaning the cells without risking harm or equipment issues.
Remove the Salt Chlorinator Cell From the Pool System
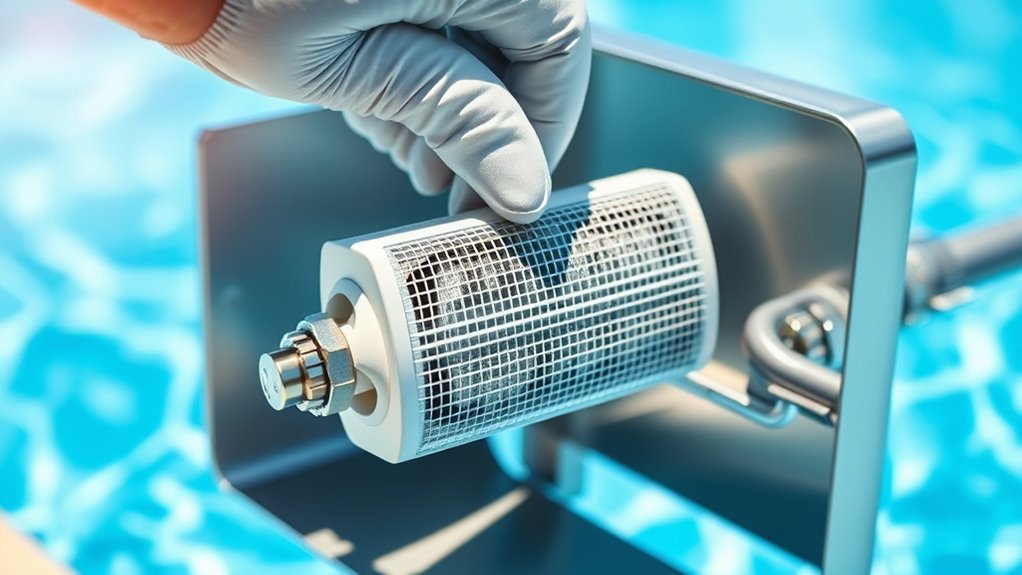
With the pool pump and power supply safely turned off, you can now focus on removing the salt chlorinator cell from the system.
First, locate the cell along the plumbing line, usually near the pool pump or filtration system.
Carefully unscrew the unions or connectors on both ends of the cell using a wrench or by hand if they’re not too tight. Be prepared for some residual water to leak out, so keep a bucket or towel handy.
Gently pull the cell away from the pipe, taking care not to damage the wiring or surrounding components.
Once free, place the cell on a stable surface for cleaning. Handling it with care ensures you don’t cause any damage that might affect its performance.
Inspect the Cell for Calcium Buildup and Debris

Although the cell looks clean at a glance, you should carefully inspect it for calcium buildup and debris that can hinder its efficiency. Check the metal plates inside the cell, as calcium deposits often appear as white, chalky layers.
Also, look for leaves, algae, or dirt stuck between the plates. Removing these obstructions ensures proper water flow and ideal chlorine production.
Use this quick checklist to guide your inspection:
| Area to Inspect | What to Look For | Impact if Ignored |
|---|---|---|
| Metal Plates | White calcium deposits | Reduced chlorine output |
| Cell Walls | Algae or dirt buildup | Flow blockage |
| Electrical Connectors | Corrosion or debris | Poor electrical contact |
Spotting these issues early helps keep your chlorinator running smoothly.
Prepare a Cleaning Solution With White Vinegar or Cell Cleaner
Since calcium buildup can be stubborn, you’ll want to prepare an effective cleaning solution using either white vinegar or a specialized cell cleaner to dissolve deposits without damaging the chlorinator cell.
White vinegar is a natural acid that safely breaks down calcium and mineral deposits.
Mix one part white vinegar with one part water in a bucket or container large enough to hold the cell.
Alternatively, if you opt for a commercial cell cleaner, follow the manufacturer’s instructions carefully to ensure proper dilution and safety.
Avoid using harsh chemicals or abrasive cleaners, as they can harm the cell plates.
Preparing the right solution is essential to restore your salt chlorinator’s efficiency and prolong its lifespan without causing any damage.
Soak the Chlorinator Cell in the Cleaning Solution
Before you start soaking, make sure the chlorinator cell is fully submerged in the cleaning solution to allow the vinegar or cleaner to break down calcium deposits effectively. Place the cell in a container large enough to hold it completely and pour your prepared solution over it.
Ensure the chlorinator cell is fully submerged in the cleaning solution for effective calcium deposit removal.
Let it soak for about 1 to 2 hours, depending on the severity of the buildup. During this time, the acidic solution will loosen stubborn scale and mineral deposits, making the cleaning process much easier.
Avoid soaking for too long, as extended exposure might damage the cell’s plates. Check occasionally to ensure the cell remains fully covered and the solution stays effective.
Once soaking is complete, you’ll be ready to move on to the next step to remove any remaining residue.
Gently Scrub the Cell Plates With a Soft Brush
Once the chlorinator cell has soaked sufficiently, you’ll want to gently scrub the plates with a soft brush to remove any loosened deposits.
Use a brush with soft bristles, like a toothbrush or a dedicated pool brush, to avoid damaging the delicate plates.
Focus on areas with visible buildup, moving the brush in gentle, circular motions.
Avoid using wire brushes or anything abrasive, as these can scratch or harm the plates, reducing the cell’s efficiency.
Take your time and be thorough but gentle, ensuring you dislodge calcium or scale without forcing it.
If stubborn deposits remain, you can repeat the soaking and scrubbing process.
This careful cleaning helps maintain the cell’s performance and extends its lifespan.
Rinse the Cell Thoroughly With Fresh Water
How do you guarantee all loosened deposits are completely removed after scrubbing? The answer is a thorough rinse with fresh water. This step flushes away any residual debris and cleaning solution, protecting your chlorinator cell from damage.
Follow these simple steps:
- Turn off the pool pump to prevent water flow during rinsing.
- Use a hose with a gentle spray setting to avoid harming the cell plates.
- Rinse each side of the cell thoroughly, ensuring water reaches all crevices.
- Continue rinsing until the water runs clear and no foam or dirt remains.
Check for Any Remaining Deposits and Repeat if Necessary
After rinsing, carefully inspect the chlorinator cell for any remaining deposits or buildup. Look closely at the plates inside the cell; if you spot stubborn calcium or mineral deposits, don’t worry.
You’ll need to repeat the cleaning process to remove these effectively. Soak the cell again in the cleaning solution, following the same steps as before, and allow it enough time to break down the deposits.
Once soaked, give it another gentle scrub if necessary, then rinse thoroughly with fresh water.
Checking and repeating ensures your chlorinator cell works efficiently and lasts longer.
Make sure there’s no visible residue before moving on, as even small deposits can reduce performance and cause damage over time.
Reinstall the Salt Chlorinator Cell Into the Pool System
Ensuring your salt chlorinator cell is completely clean sets the stage for reinstalling it back into your pool system. Here’s how to do it efficiently:
- Align the cell with the flow direction indicated on its housing to ensure proper water circulation.
- Carefully slide the cell back into its designated slot, making sure it fits snugly without forcing it.
- Reconnect any electrical connectors and secure all clamps or fasteners to prevent leaks or loose connections.
- Double-check that all seals and O-rings are properly seated to maintain a watertight system.
Taking these steps will help your salt chlorinator cell function correctly and extend its lifespan.
Now you’re ready to move on to powering up your system and monitoring performance.
Turn On the Power and Monitor the Cell’s Performance
Once you’ve reinstalled the salt chlorinator cell, you can turn on the power to your pool system and start monitoring its performance. Check the control panel to ensure the system powers up without error codes.
Watch the chlorine output levels closely during the first few hours to confirm the cell is producing chlorine efficiently. If your system has a flow sensor, verify that water is flowing correctly through the cell to avoid damage.
Listen for unusual noises or vibrations that might signal improper installation. Regularly inspect the cell’s performance over the next few days to catch any issues early.
Proper monitoring helps maintain water quality and extends the lifespan of your salt chlorinator cell, ensuring your pool stays clean and safe.
Frequently Asked Questions
How Often Should I Clean My Salt Chlorinator Cell?
You should clean your salt chlorinator cell every 3 to 6 months, depending on your pool’s usage and water chemistry. Regular cleaning helps maintain efficiency and prevents scale buildup, keeping your system running smoothly.
Can I Use Bleach Instead of Vinegar to Clean the Cell?
No, you shouldn’t use bleach to clean your salt chlorinator cell because it can damage the metal components.
Vinegar’s mild acidity safely removes scale without harming the cell, so stick with vinegar for cleaning.
What Are the Signs That My Chlorinator Cell Needs Cleaning?
When your chlorinator cell looks like a dusty old book, your pool’s chlorine levels drop, or the water feels less crisp, it’s screaming for a clean.
Don’t ignore these signs, they’re your cell’s SOS!
Is It Safe to Clean the Cell Without Removing It From the System?
No, it’s not safe to clean the chlorinator cell without removing it first. You’ll risk damaging the system or exposing yourself to electrical hazards.
Always turn off power and carefully remove the cell before cleaning.
How Do I Prevent Calcium Buildup on the Chlorinator Cell?
You can prevent calcium buildup by regularly checking and cleaning your chlorinator cell, maintaining balanced pool water chemistry, and using a sequestering agent to bind calcium.
This keeps your system efficient and extends its lifespan.
Conclusion
Now that you’ve turned off the power and cleaned away the stubborn calcium, you’re not just restoring your salt chlorinator cell—you’re renewing your pool’s heartbeat.
With each rinse, grime fades, and clarity returns. You’ll feel the difference the moment you switch it back on: a smoother flow, a brighter sparkle.
It’s a simple process, but the results? Invigorating. Easy steps, powerful impact—your pool’s clear future starts here with clean swimming pool salt chlorinator cells.